OAuth is an authorization standard widely used among bigger companies like Google, Apple, and Facebook. OAuth offers a higher level of security than tokens because the OAuth tokens are automatically refreshed, and you can limited with a scope.
Dixa supports Authorization Code Flow and Client Credentials Flow as OAuth strategies. The third party service determines the choice.
- The connecting API must support OAuth 2
- You need to be a workspace admin in Dixa to create a custom card
- Because of the secure nature of an OAuth application, it's necessary to configure both sides of the transaction. The third party is the application, and Dixa is the user.
- The Dixa backend handles the grant and can be ignored when configuring OAuth in Dixa.
- Part of the Dixa OAuth feature is to refresh tokens automatically.
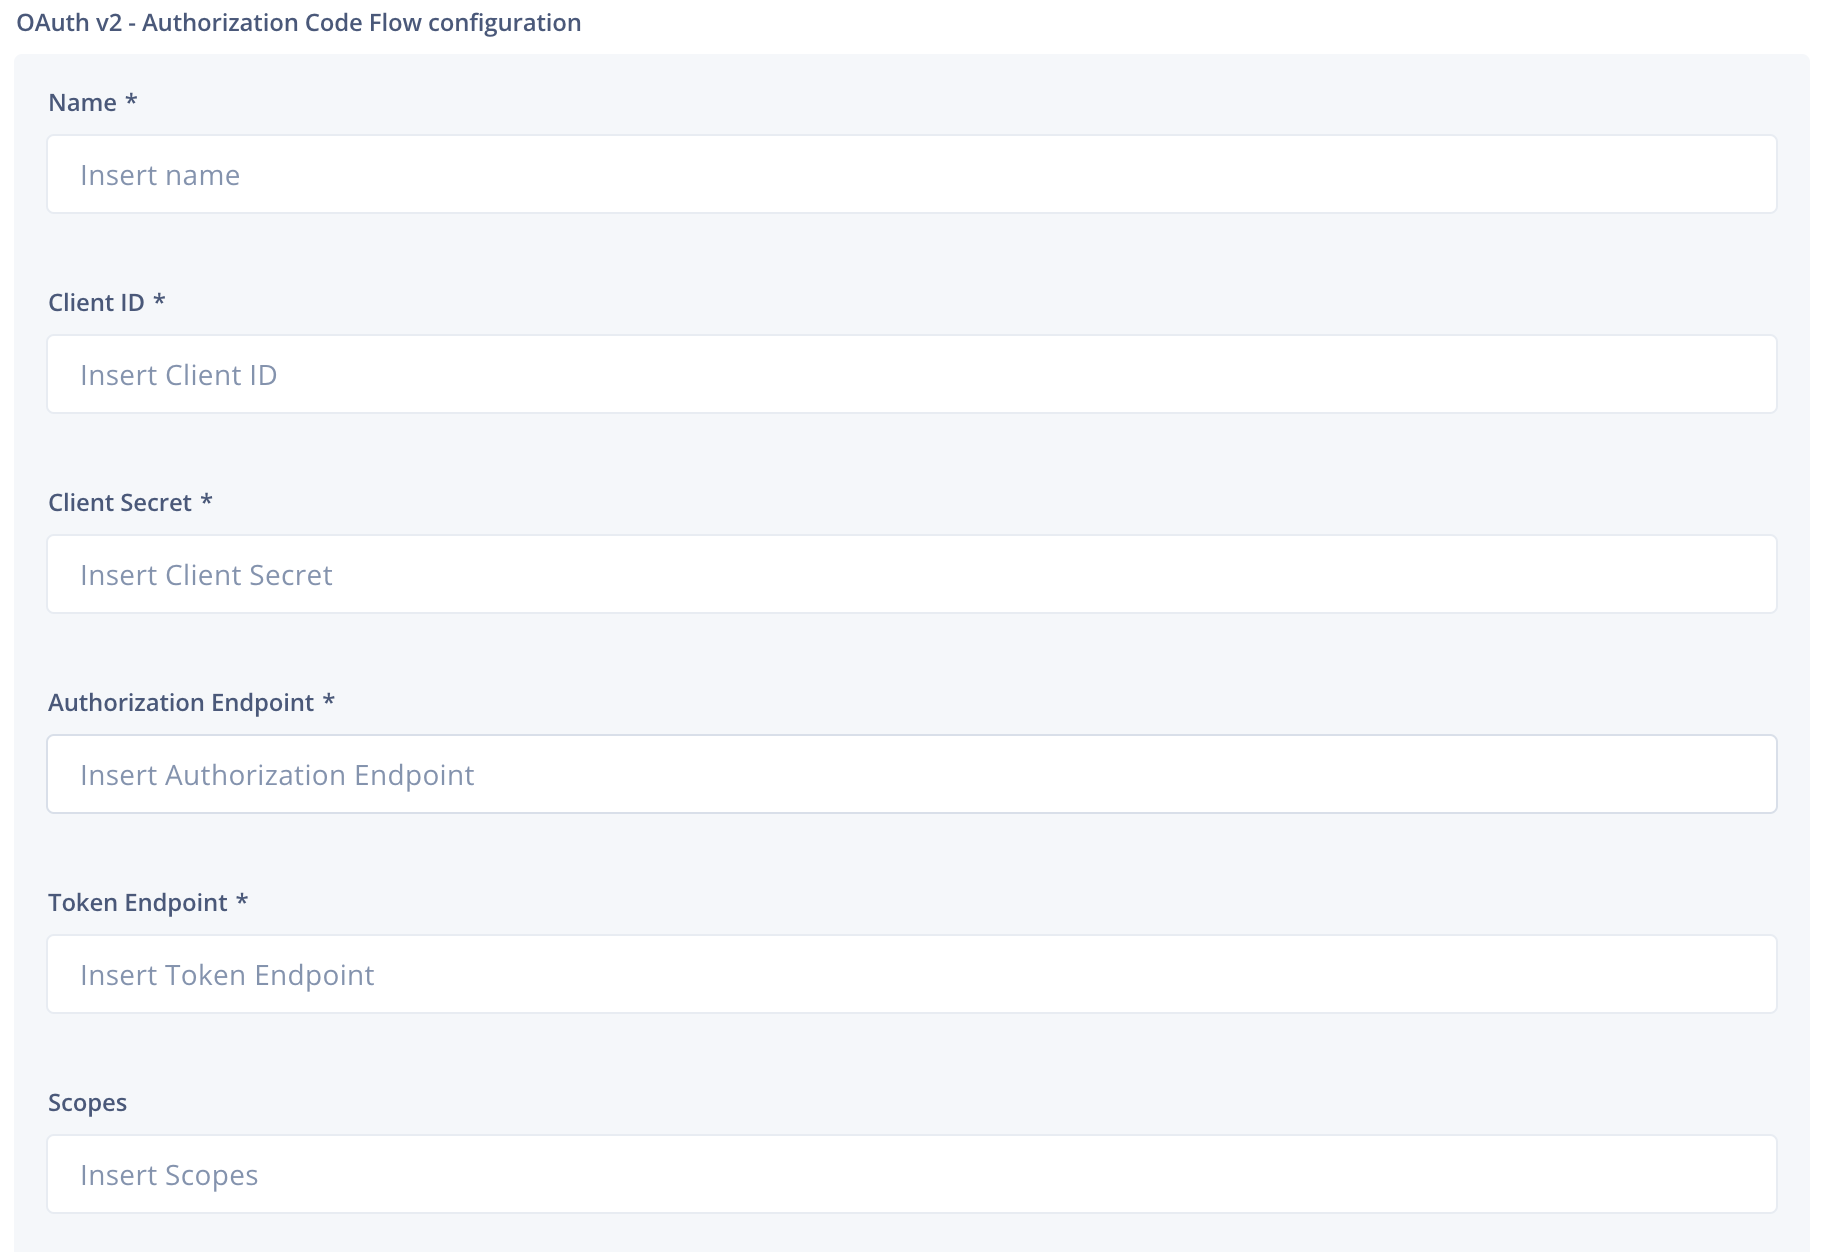
You will need to obtain the following at the third party for an authorization code flow:
- client ID
- client secret
- Scope
- Authorization Endpoint
- Token Endpoint
Applications will ask for a redirect URL, which is always the same for Dixa custom cards. Insert the following into the third-party setup:
https://partner-integrations.dixa.io/auth/provider/callbackA scope can limit access to areas of an API. If you take Google as an example, a scope for their calendar will look like this:
https://www.googleapis.com/auth/calendar.readonly
And with Hubspot, a scope for OAuth and CRM objects looks like this:
oauth crm.objects.contacts.read
The third-party typically generates the client ID and secret, which are unique in syntax and length.
In Dixa, we must match the scope, client ID, and secret from the third party.
The third party defines the authorization and token endpoints and can usually be found in the documentation or when configuring the token/app.
After you have populated the necessary fields, you save the information by clicking Save configuration and then proceed by selecting Authorize. A pop-up will open asking you to sign in (if you're not already signed in with the third party). You must click on both the Save configuration and Authorize buttons.
Because of the secure nature of an OAuth application, it's necessary to configure both sides of the transaction. The third party is the application, and Dixa is the user.
You will need to obtain the following at the third party for a credential code flow:
- client ID
- client secret
- Authorization Endpoint
- Token Endpoint
- Scope
- Audience
Applications will ask for a redirect URL, which is always the same for Dixa custom cards. Insert the following into the third-party setup:
https://partner-integrations.dixa.io/auth/provider/callbackA scope can limit access to areas of an API. If you take Google as an example, a scope for their calendar will look like this:
https://www.googleapis.com/auth/calendar.readonly
And with Hubspot, a scope for OAuth and CRM objects looks like this:
oauth crm.objects.contacts.read
The third-party typically generates the client ID and secret, which are unique in syntax and length.
The audience should be referencing Dixa.
In Dixa, we must match the scope, client ID, and secret from the third party.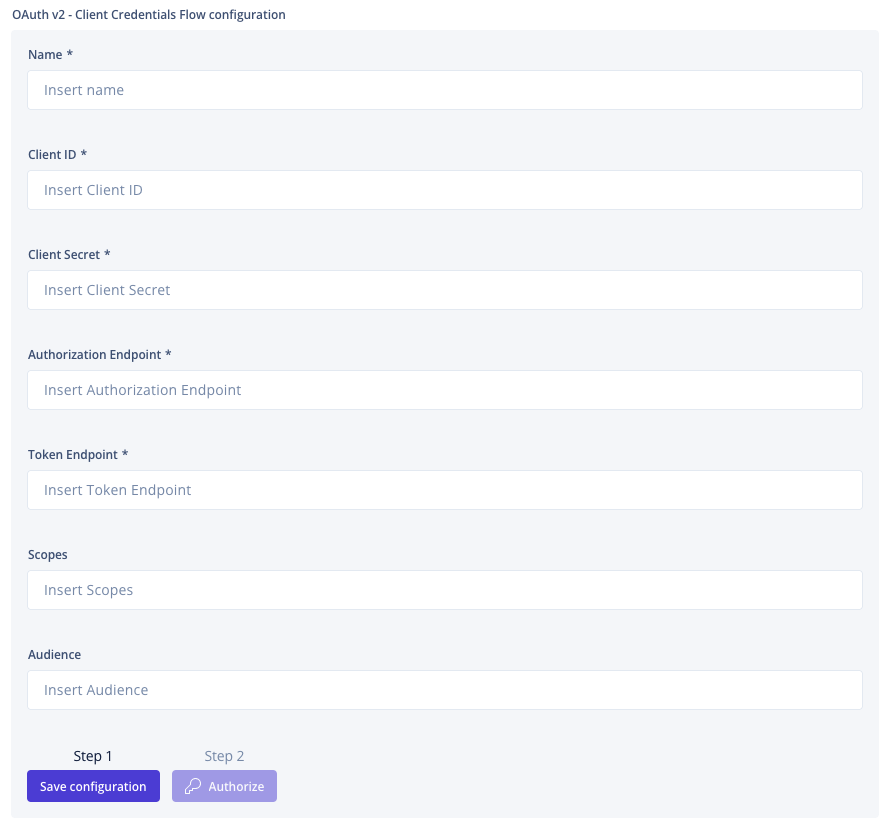
The third party defines the Authorization Endpoint and Token Endpoint. Both can usually be found in their documentation.
Scope and Audience are optional for an OAuth flow but can be required from a third party. Auth0, Ory, and MojoAuth have great reads on their implementation of the audience, which can be used to get a better understanding.
After you have populated the necessary fields, you save the information by clicking Save configuration and then proceed by selecting Authorize. A pop-up will open asking you to sign in (if you're not already signed in with the third party). You must click on both the Save configuration and Authorize buttons.